 This is a
single-chip cart, the entire game program and data is held on the
large black ROM chip.
This is a
single-chip cart, the entire game program and data is held on the
large black ROM chip.Genesis cart disassembling
Sometimes the only way to find out the revision number of a game, or whether it uses special hardware, is to physically open up the cartridge and look at the circuit board inside! This page gives you instructions on how to disassemble a Genesis cart so you can see what's inside.
Japanese Mega Drive carts
The Jap carts have to be the easiest ones to
open up, though the process may seem difficult at first.
On the back of the cart, you'll see a label with either Japanese
or English text, giving the normal warnings (do not immerse in
water, do not subject to violent shock etc). Run your fingers
over this label, pressing fairly hard and you'll feel two
depressions at either side of the label. These are the screws.
Either pierce the label, or peel the corners back slightly.
Underneath are two normal, cross-head screws. You can undo these
with a regular screwdriver.
Once you have got the screws out, place the cartridge face-down on a surface and lift up the bottom of the rear part. Since the label goes over the top, it will act like a hinge and the cart back will open like a door. Be careful not to tear the label!
Now you should see a circuit board inside the cartridge. Simply pull it upwards, off the two pegs (there's nothing holding it down) and you can then look at the ROM board.
Europe/US carts
These carts are trickier to open, mainly
because of the special screws used.
On the back of the cart you will see a panel with the warnings
embossed onto the plastic of the cartridge (rather than a
separate label). Beside this panel are two screws which hold the
cartridge together. You'll notice that they're nothing like
regular screws, and therefore a normal screwdriver will be
useless!
If you can find the special hex-head screwdriver for these screws, then use it - but good luck getting hold of one! I've seen them go for more than $30 on eBay!
Or, you can use a pair of needle-nose pliers. The pointier they are, the better. Put the pliers at right-angles to the cart, and squeeze them together to grip onto two of the depressions on the screws. When you've got a firm hold, turn the screw anticlockwise and it should start to undo. You'll probably loose the grip several times (and scrape the black coating off the screw) but this doesn't matter. Just grip the screw again and turn. Once it's high enough I recommend you do the rest with your fingernails.
If you're opening up a cart for the first time
(i.e. never been opened before), the screws may be done up very
tightly. Persevere though, they will come!
If the points of the pliers can't touch the plastic at the bottom
of the screw hole, they may not be pointy enough - try some
others.
Once you have the screws out, put the cart face-down on a flat surface and lift up the rear of the cart. It should come right off; the label doesn't go over the edge like on Jap carts. You should then see the circuit board. Like the Jap cart, just lift it upwards off the pegs and there you have it.
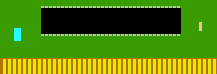
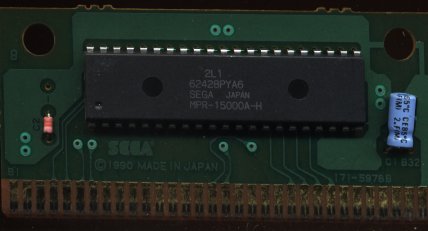
Now that you have the cart open and have extracted the ROM board, you'll probably want to know what all the components are doing. There is usually at least one resistor (small, brown/beige component with stripes on it), and a smoothing capacitor (usually blue or purple, cylindrical). If your cart looks like:
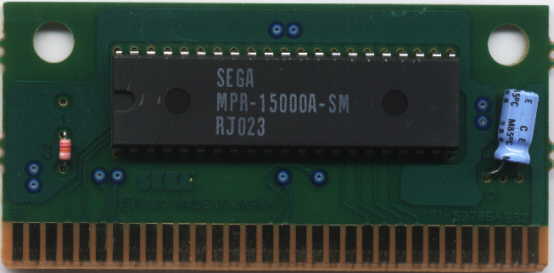
This is a
single-chip cart, the entire game program and data is held on the
large black ROM chip.
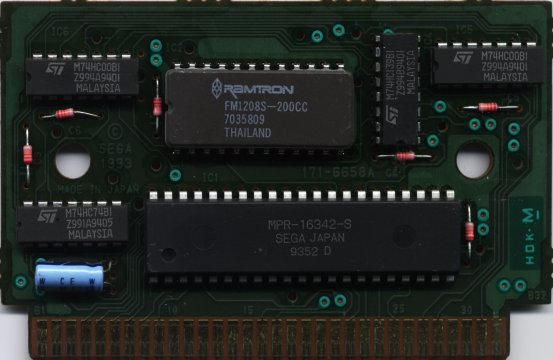
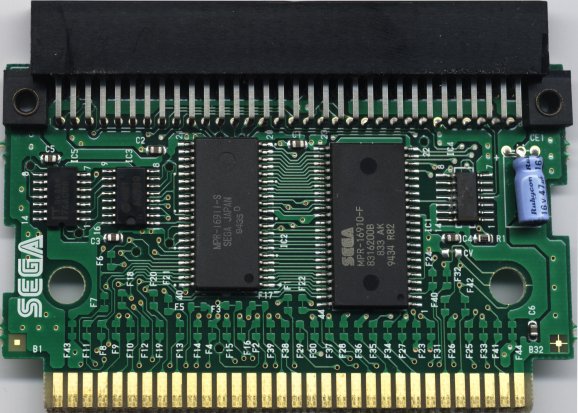
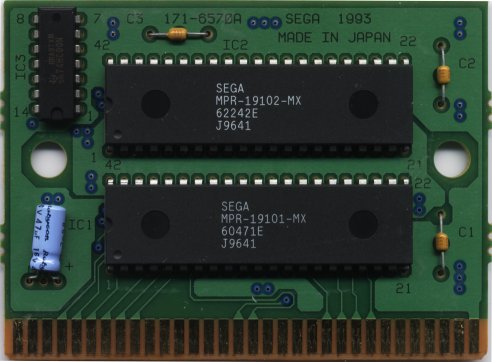
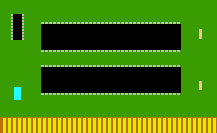 This is a
dual-chip single-ROM cart. Basically they didn't have enough room
to put the entire game program and data onto one ROM chip, so
they spread it across two chips instead. The small chip in the
top left is a logic circuit, that routes ROM reads to the
relevant chip.
This is a
dual-chip single-ROM cart. Basically they didn't have enough room
to put the entire game program and data onto one ROM chip, so
they spread it across two chips instead. The small chip in the
top left is a logic circuit, that routes ROM reads to the
relevant chip.
If dumping using an SMD clone or Cyan's ROM reader, there's no
need to dump the chips separately. The logic circuit will make
the console (or dumper) read it as one large, seamless ROM file.
If your cart looks different to either of those standards, or has extra chips, it's probably using special hardware such as SRAM or a DSP chip for special effects.
Re-assembling carts
Unless your Genesis/Mega Drive is all opened up too, you'll find it hard to insert and remove games when they're in this opened-up state. So eventually you'll want to put them back together.
Firstly, put the ROM board back onto the two pegs inside the cartridge, making sure the side with the ROM chips is towards the FRONT of the cartridge. This is very important - putting the cart in backwards could blow up your system!
Secondly, put the back of the cartridge on again, either by hinging it closed (Jap carts) or by replacing the back carefully (U and E).
Now, you could indeed use the cartridge in this state, plugging it into your system, but unless it's screwed back together there's a chance it might fall apart in your hands, and/or the ROM board dropping out when you don't expect it. Also, if the cartridge isn't screwed together, the ROM board might be loose inside the system and lead to game crashes.
To close up the Jap carts, it's the reverse of opening them. Peel back the label, re-insert the screws and tighten them up with a cross-point screwdriver. Make it tight enough to hold the cart together, but not so tight that the screw breaks!
If you had problems opening U and E carts,
you're in for another nightmare putting them back together!
Re-insert the screws, and make sure they're properly engaged into
the screw threads. If you get the screw cross-threaded, it'll
require immense force to screw it back in, and you'll find it
almost impossible to re-open the cart again!
Screw them in as far as you can get them with your fingernails,
then use the pointy pliers to tighten the screws up (turning
clockwise). When you start to feel resistance STOP turning - the
screws can easily get broken or cross-threaded with excessive
force!
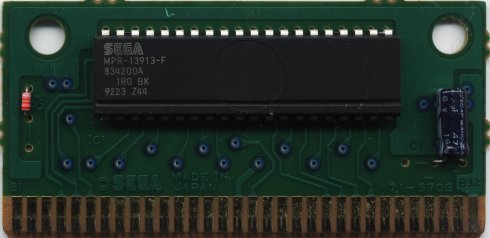
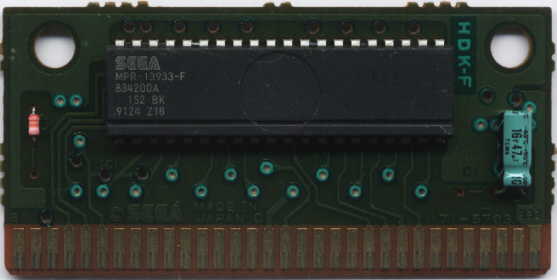
Finally, as this is a Sonic page, I've decided to include some scans of the insides of Sonic cartridges. There's no guarantee that yours will look the same inside, but if you don't want to open your carts take a look at these scans instead. (Links to JPG images, should load in browser)
Sonic 1
Sonic 1 JAP
Sonic 2
Sonic 2 JAP
Sonic 3
Sonic &
Knuckles
Sonic 3D